
Package Contents
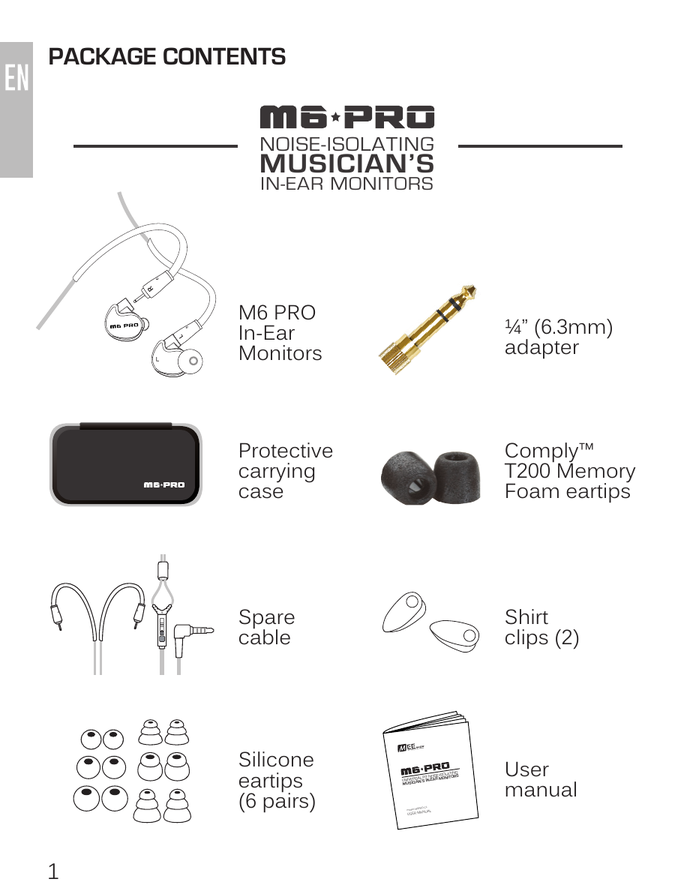
- M6 PRO In-Ear Monitors
- Protective carrying case
- Spare cable
- Comply™ T200 Memory Foam eartips
- Silicone eartips (6 pairs)
- Shirt clips (2)
- ¼" (6.3 mm) adapter
- User manual
First Use: Attaching the Earpieces
The M6 PRO includes two detachable, interchangeable cables:
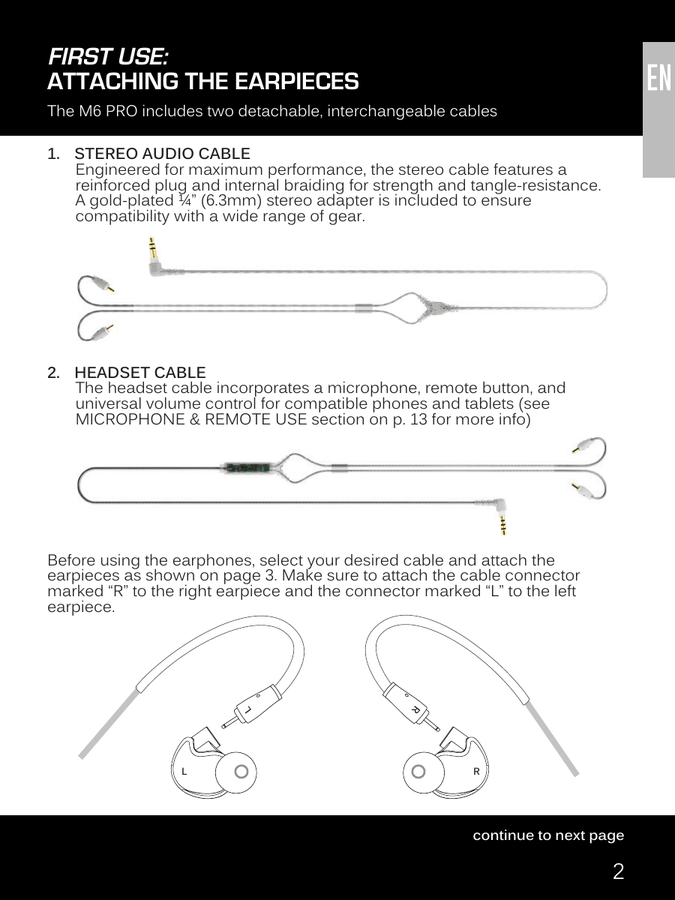
1. Stereo Audio Cable
Engineered for maximum performance, the stereo cable features a reinforced plug and internal braiding for strength and tangle-resistance. A gold-plated ¼" (6.3 mm) stereo adapter is included to ensure compatibility with a wide range of gear.
2. Headset Cable
The headset cable incorporates a microphone, remote button, and universal volume control for compatible phones and tablets (see Microphone & Remote Use for more info).
Before using the earphones, select your desired cable and attach the earpieces as shown. Make sure to attach the cable connector marked "R" to the right earpiece and the connector marked "L" to the left earpiece.
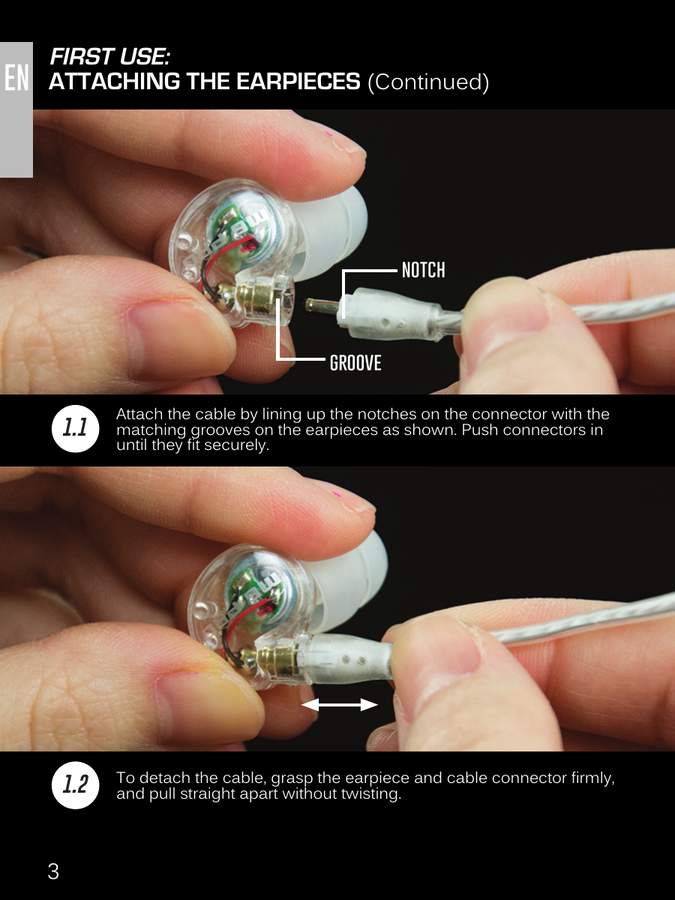
Step 1.1 – Attaching the Cable
Attach the cable by lining up the notches on the connector with the matching grooves on the earpieces as shown. Push connectors in until they fit securely.
Step 1.2 – Detaching the Cable
To detach the cable, grasp the earpiece and cable connector firmly, and pull straight apart without twisting.
↑ Back to topConfiguring for Your Ears: Eartips
Multiple sets of eartips are included to ensure you get the best fit with your headphones. We recommend trying all of the included eartips. If you experience tinny sound or a lack of bass, try different eartips.
The correct eartip for your ear will:
- Allow the earphone to fit flush in the ear
- Seal with your ear canal and reduce outside noise when inserted
- Provide good bass response
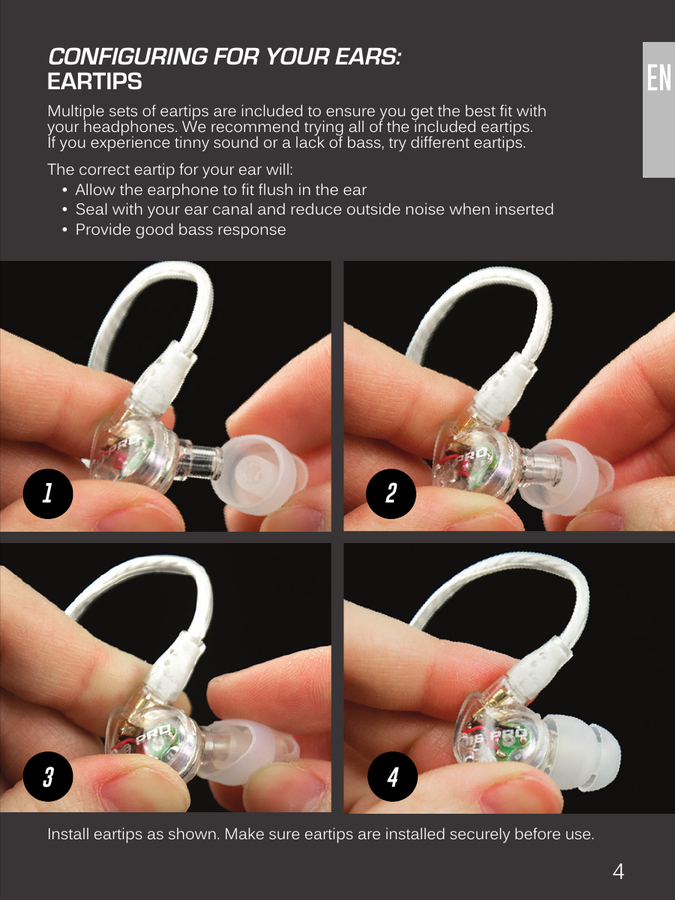
Install eartips as shown (steps 1–4). Make sure eartips are installed securely before use.
↑ Back to topConfiguring for Your Ears: Comply™ Memory Foam Eartips
Inserting the Comply™ Eartip
- Roll the tip into a thin, round cylinder.
- Pull back and up on the ear to open the canal. Gently insert the entire tip into the ear.
- Hold the tip in place until it expands.
Changing the Comply™ Eartip
Remove the old Comply™ foam tip by firmly grasping the entire tip, including the plastic inner core, from the back of the tip (close to the earpiece). Firmly pull the tip off the earphone nozzle, rotating slightly or pulling at an angle if necessary to overcome friction.
Clean the earphone nozzle of any debris. Securely install the new Comply™ Premium Earphone Tip onto a clean, dry nozzle. Recommended replacement is after 3 months of regular use.
The Comply™ eartip included with the M6 PRO is the T200 Medium. For replacement tips, visit complyfoam.com.
↑ Back to topConfiguring for Your Ears: Memory Wire (First Use)
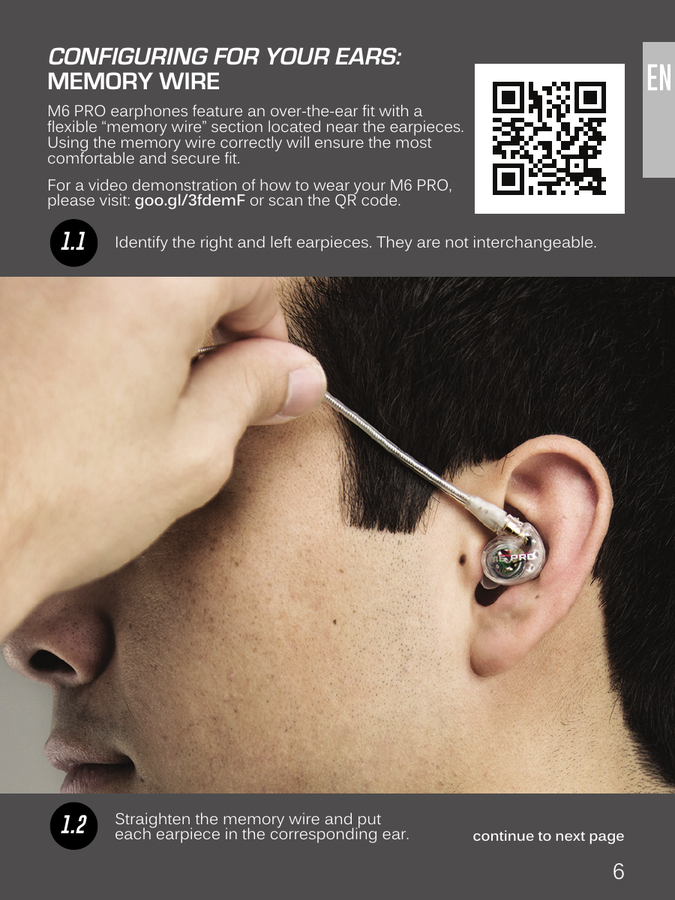
M6 PRO earphones feature an over-the-ear fit with a flexible "memory wire" section located near the earpieces. Using the memory wire correctly will ensure the most comfortable and secure fit.
For a video demonstration, visit goo.gl/3fdemF or scan the QR code on the cover.
Step 1.1 – Identify the Earpieces
Identify the right and left earpieces. They are not interchangeable.
Step 1.2 – Insert the Earpieces
Straighten the memory wire and put each earpiece in the corresponding ear.
Step 2.1 – Achieve a Flush Fit
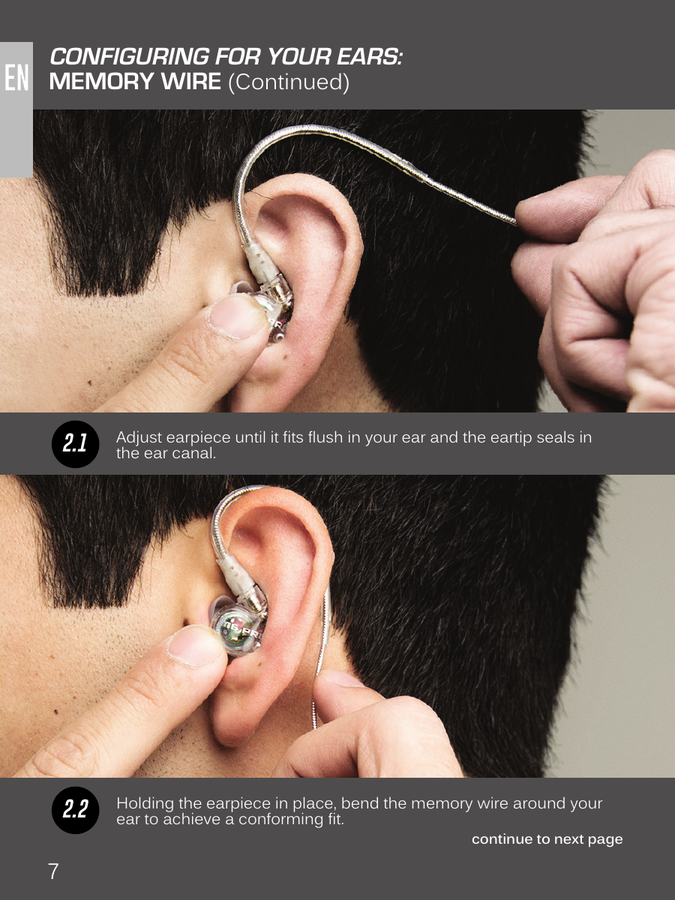
Adjust the earpiece until it fits flush in your ear and the eartip seals in the ear canal.
Step 2.2 – Shape the Memory Wire
Holding the earpiece in place, bend the memory wire around your ear to achieve a conforming fit.
Step 3 – Secure the Fit
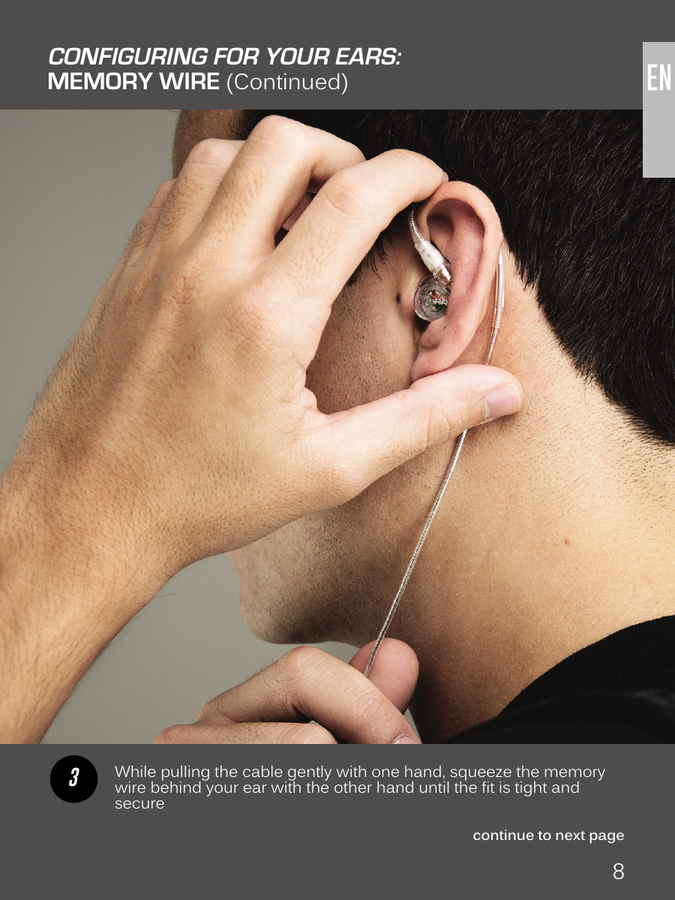
While pulling the cable gently with one hand, squeeze the memory wire behind your ear with the other hand until the fit is tight and secure.
Step 4.1 – Tighten the Cable Cinch
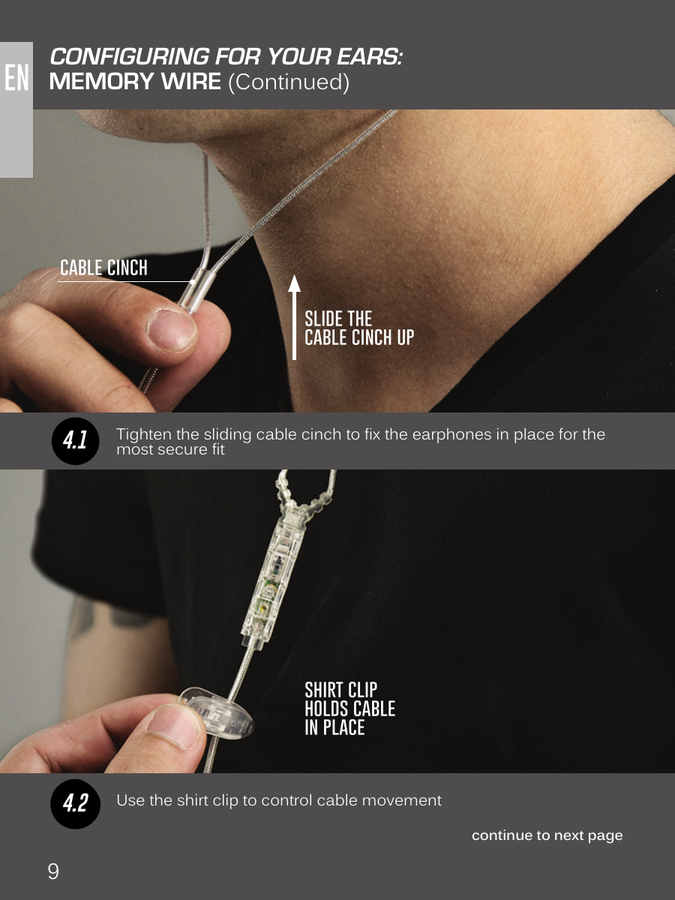
Tighten the sliding cable cinch to fix the earphones in place for the most secure fit.
Step 4.2 – Use the Shirt Clip
Use the shirt clip to control cable movement.
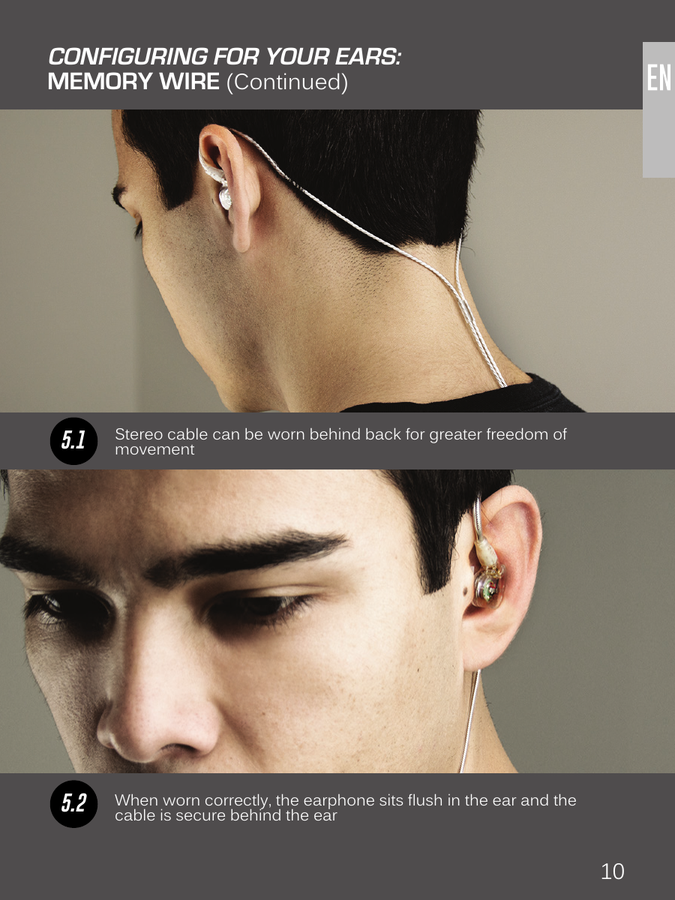
Step 5.1 – Wearing the Stereo Cable
The stereo cable can be worn behind the back for greater freedom of movement.
Step 5.2 – Correct Fit
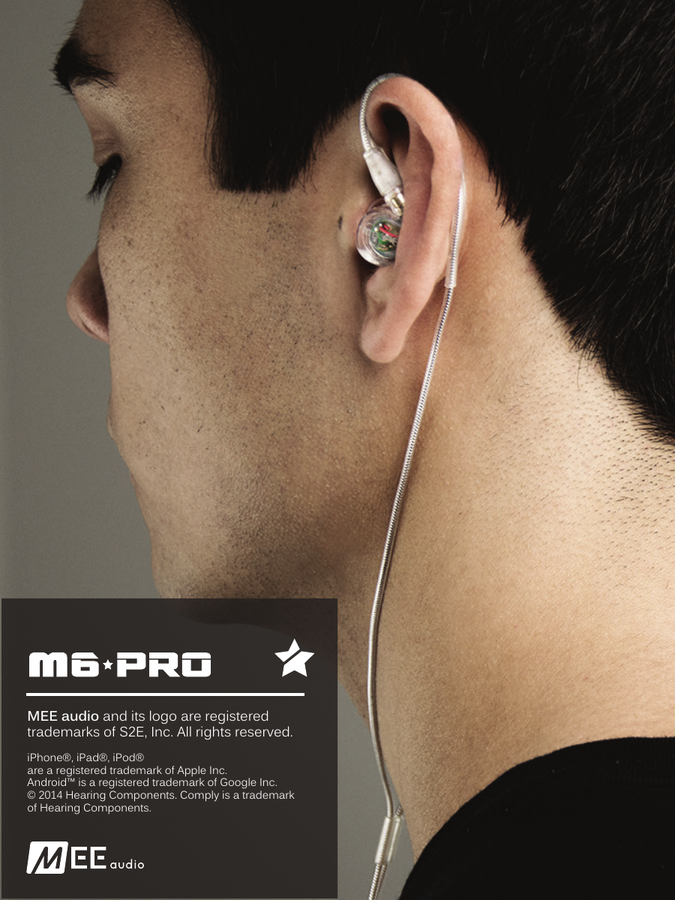
When worn correctly, the earphone sits flush in the ear and the cable is secure behind the ear.
↑ Back to topConfiguring for Your Ears: Subsequent Use
After first use, the memory wire will retain its approximate shape for easier future installation.
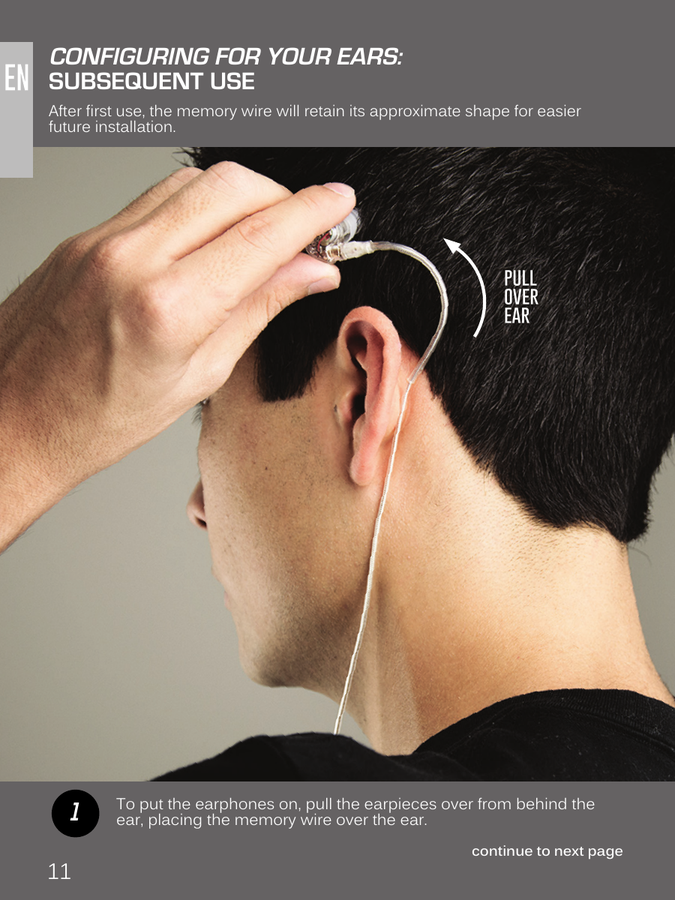
Step 1 – Put Earphones On
To put the earphones on, pull the earpieces over from behind the ear, placing the memory wire over the ear.
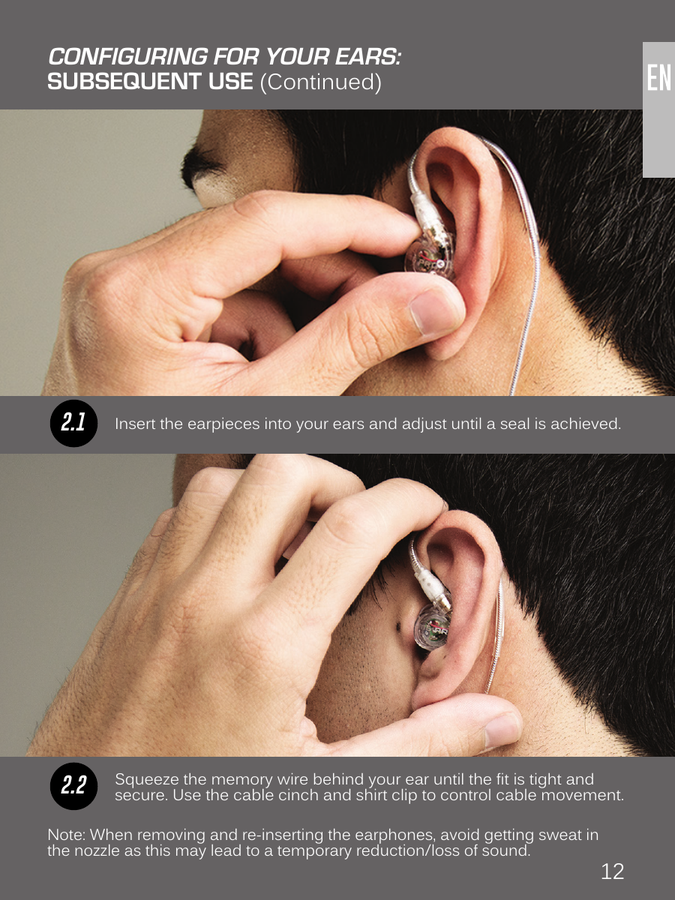
Step 2.1 – Insert and Adjust
Insert the earpieces into your ears and adjust until a seal is achieved.
Step 2.2 – Secure the Fit
Squeeze the memory wire behind your ear until the fit is tight and secure. Use the cable cinch and shirt clip to control cable movement.
Note: When removing and re-inserting the earphones, avoid getting sweat in the nozzle as this may lead to a temporary reduction or loss of sound.
↑ Back to topMicrophone & Remote Use
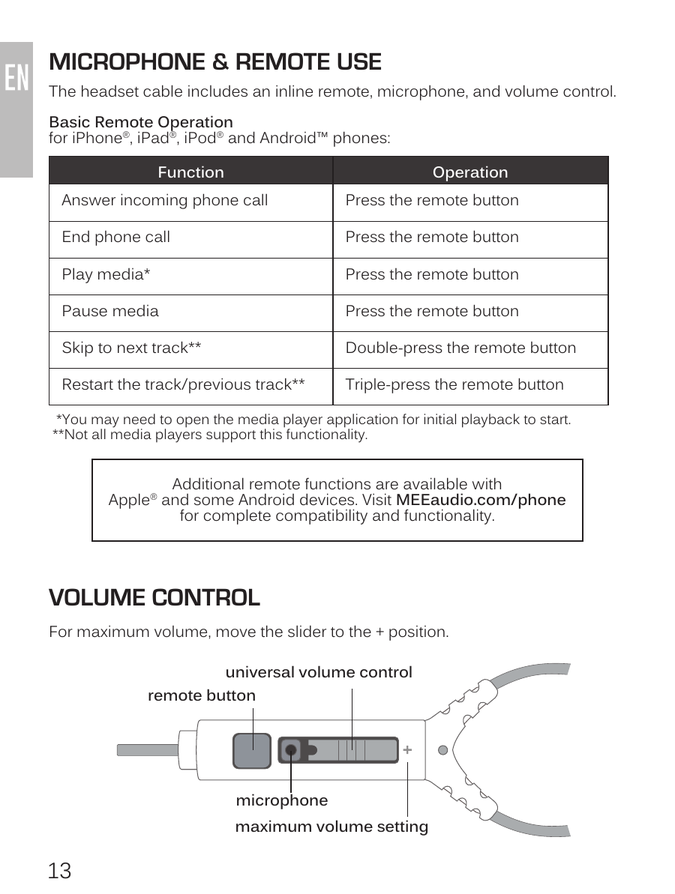
Volume Control
The headset cable includes an inline remote, microphone, and volume control. For maximum volume, move the slider to the + position.
Basic Remote Operation
For iPhone®, iPad®, iPod®, and Android™ phones:
| Function | Operation |
|---|---|
| Answer incoming phone call | Press the remote button |
| End phone call | Press the remote button |
| Play media* | Press the remote button |
| Pause media | Press the remote button |
| Skip to next track** | Double-press the remote button |
| Restart the track / previous track** | Triple-press the remote button |
*You may need to open the media player application for initial playback to start.
**Not all media players support this functionality.
Additional remote functions are available with Apple® and some Android devices. Visit MEEaudio.com/phone for complete compatibility and functionality.
↑ Back to topCare and Cleaning
- Do not remove from ears or unplug by pulling on the cable. Always grasp the plastic part of the plug or earpieces.
- If necessary, clean the earphones with a small amount of hydrogen peroxide on a cotton swab. Swab only the outside of the earphone. Eartips can be removed and rinsed under running water or in hydrogen peroxide. Allow earphones and eartips to dry completely before resuming use.
Warning, Troubleshooting & Warranty
Warning
Using headphones at high to moderate volumes for extended periods of time will result in permanent hearing damage. It is advised you keep volume levels moderate to low at all times for your safety. Do not use while driving a car, cycling, operating machinery, or performing other activities that require hearing surrounding sounds.
It is advised to turn the volume on your device all the way down before connecting your headphones, then gradually increase the volume until you reach a comfortable listening level.
Troubleshooting
Visit MEEaudio.com/support for solutions to common issues.
Warranty
MEE audio earphones purchased from authorized retailers are covered by a 1-year manufacturer warranty. For more information, visit MEEaudio.com/warranty.
Lifetime Replacement
Whether your headphones get crushed, shredded, fried, misplaced, or carried off by army ants, MEE audio has you covered. Just tell us what happened and we'll give you a new pair at half price, no questions asked.
Visit MEEaudio.com/M6PRO-LRP for more information or to request a replacement.
Questions? We're Here to Help!
Website: www.MEEaudio.com
Email Support: support@MEEaudio.com
Trademarks
MEE audio and its logo are registered trademarks of S2E, Inc. All rights reserved. iPhone®, iPad®, iPod® are registered trademarks of Apple Inc. Android™ is a registered trademark of Google Inc. © 2014 Hearing Components. Comply is a trademark of Hearing Components.
↑ Back to top